Friday, April 22, 2011

Life on the Diagonal

A photo is a two dimensional thing. It has height and it has width, but alas, no depth.

So how can you add a third dimension to the lowly photograph?

Ok, you can’t. But you can create the illusion of depth in your images with the use of diagonal lines. The most basic way to do this, by example, is by taking a photo of a house from the corner instead of straight on. Look at how you can tell that your subject, the house, has a real sense of depth.

But that is just a starting place.

Diagonals are everywhere - but sometimes they are so obvious that you have to look for them.  Consider the street you live on. Where are the diagonals? Look at the curbs and how the trail off into the distance? Diagonals!

The hallway at school. Photogenic? You may not think so - but look! Step to the side and you have created diagonals and perspective, and DEPTH. That's what we are looking for, that third dimension.

Diagonals don't stop there. Look at a line of trees, and how their trunks make a line. Look at any thing or scene that interests you. Move yourself until you find an angle that generates a diagonal leading you in to the photos!

Homework? Use the "Boom!" method from March 30, or use your camera and take photos of your own house or building, emphasizing the diagonal lines formed by the roof and the walls,  and notice how your position changes everything!

Next week, curves!

Wednesday, April 13, 2011

The Rule of Thirds


Art has rules, or at least guidelines….

Here is the “Rule of Thirds”, paraphrased. “Imagine a tic-tac-toe board, with your two horizontal and two vertical lines drawn on your image. The center of interest of an image should be at one of the four intersections of those tic-tac-toe lines.”

These rules aren’t spoken by some “sage of artiness” with no context. These rules work. What most people do NOT know, is WHY the rules work, and exactly what the intent of the rules is.

Take a look at any "snapshot". The subject is in the exact center, you see what it is, then go to the next picture. How fulfilling. (not…)

Compare that with the well composed image, with the center of interest being at one of the “third” intersections. Pay attention to where your eyes go. Do they explore the image? Do they look around to see what else they can find? Are your eyes and your interest drawn in to the image?

You see, THAT is the intent of the “Rule of Thirds”, to make your eyes explore, and your mind be interested.

You may have noticed, I don’t talk about “pictures”, rather “images”. You “take” pictures, you “create” images. A snapshot is a picture, Images are created, designed and planned. My goal for you, dear reader, is for you to begin to create beautiful, exciting, provoking images that your friends and colleagues will be very, very impressed with.

Homework? Find a photo you have taken that you feel is really good, and compare it to one where the subject is planted smack in the middle. Compare your photos paying attention to which image is more interesting. See?


Wednesday, April 6, 2011

Your Subject

A photo needs a subject, and people who look at the photo really ought to be able to tell what it is... No, I'm not trying to be insulting, but it's amazing how many images I see that have no identifiable subject.

When I was 12 (back in the dark ages) my family traveled around the country. It seemed that every rise we went over, every corner we went around and every change of weather, we had to stop, get out of the car, and take a photo.

When all of the slides finally got processed and we watched them, we were impressed by how many "photos of nothing" we had. Ok, so each "nothing" was a little different, but they were still "nothing", and definitely nothing we wanted to show to friends, because they were, after all, "nothing". See? This is a photo of "Nothing". Pretty nothing, but still, nothing.

Another issue with most of them was that the horizon or coast line was dead center in the image. So there was the additional question, is the subject supposed to be the land, or is it the sky? Or is it still, just "nothing"?

So this is step one. Identify your subject. Look through the viewfinder, and ask yourself, "What IS the subject?". If you can't INSTANTLY answer, recompose your image.

And don't be afraid of filling your frame with the subject. We photographers, until we realize that our clients expect it, try to hold back and not "get in their faces". Of course, this doesn't mean that you should be pushy or obnoxious, but it DOES mean that if you are being paid to do a job, you shouldn't be relegated to the background.

Later on in this series, we will cover ways to separate your subject from the background, and ways to clean up your background - but right now, you need to IDENTIFY exactly what your subject is.
 
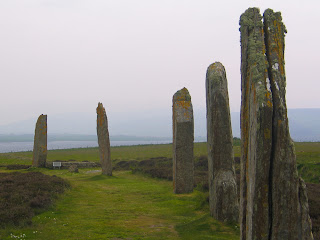
It may be the children at play, the expression when the 2 year old gets their first dill pickle, the awesome sunset through the trees, the statue in the park with the birds ….doing what birds do. Or even Stonehenge's big BIG brother, The Ring of Brodgar on the Orkney Islands...

It doesn’t matter what you choose for the subject – but it DOES matter that your viewer can identify your subject. Next time, where should you put your new found subject?

Homework? Take photos in or around your home, and fill the frame with your subject. Be a little nuts about it. Make it IMPOSSIBLE to NOT know what your subject is.